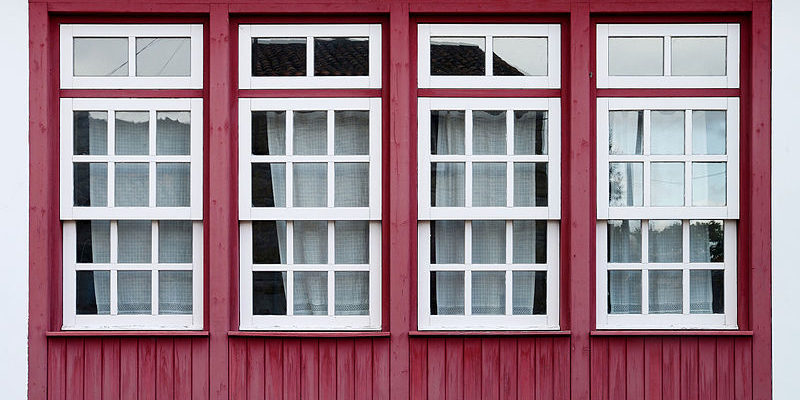
A sash window is the second most popular type of window after casement windows. They consist of a fixed panel, and a mobile ‘sash’ panel, which is capable of sliding up and down to allow the window to open and close. This is possible thanks to a complex arrangement of cords, weights and springs, that are concealed into the frame.
Since these mechanisms are concealed, they tend to boast a long lifespan. When they do fail however, it can be tricky to correct the problem and get the window functioning again – but not impossible.
Here we’ll walk you through how to remove and replace one of these components: the sliding sash window springs.
What Do Sash Window Springs Do?

Traditional sash windows operate via a system of weights and pulleys that keep the sash in position. Weights are carefully chosen to balance against the sash, so that when you open the window, you don’t have to actually bear all of the weight by yourself.
Of course, this vastly increased the weight of the window. While you can still get weight-and-pulley sash windows, modern alternatives use springs instead. This means that instead of the weight of the sash being counterbalanced by the weights in the frame, it’s counterbalanced by a set of springs, each attached to the pulley just as a weight might be.
A spring-based sash window will come with one spring on each side, with the pair balancing the weight of the sash between them. When one of the springs fails, your window will fall down on one side, and won’t stay open. Now, it might be that it’s the cord attached to the spring that’s snapped rather than the spring itself. The only way to find out is to open up the window and check.
How to Replace Sash Window Springs
You won’t need any specialised tools to do this job, though you will need:
- A flat-head screwdriver
- A new sash window spring
- Someone to help you.
Let’s run through the process, step by step.
Step 1.
You need to remove any stops that might be preventing your sashes from rising too far within the frame. These are usually plastic, and removable with just a bit of force. You’ll find them on the inside, near the top of the window.
Step 2.
Next, you’re going to pull out the clips, which you’ll find a few inches above the sash. These clips are designed to keep the weights in place while the window is complete. You might need to prise these away with the head of your screwdriver. You don’t want to remove them completely; you just need enough room to lift the sashes.
Step 3.
You’re now going to remove the sash from the frame. If it’s a large sash, then make sure your volunteer has hold of the other end. You’re going to be lifting it up on one side, following which the other should slide out easily. Lay the sash on the floor, somewhere safe.
Step 4.
You’ll be able to see the spring balances now. Push on the top of them to release the clips, and keep hold of the springs to prevent them relaxing. Lift up the spring balance until there’s no more tension on it, and you’re able to easily unhook it from the bottom of the frame. Don’t release it under tension, or you’ll risk injuring yourself and damaging the window.
Step 5.
Having removed the balance, it’s time to measure up for a replacement. To do this, measure the width across the back of the balance, and the height of the channel (not including any attachments at the top or bottom of the channel). You’ll need to match those attachments up when you’re shopping for a replacement channel.
Step 6.
If you don’t already have a replacement spring balance, you’re going to need to purchase one. It’s fine to leave the window without a spring during this time; you just won’t be able to open it.
Step 7.
Once you have your replacement spring to hand, you’re going to be attaching it using the hook at the bottom. There should be a gap at the bottom of the frame that’ll accommodate it. To get the balance into the frame, you’ll need to push down until you can get the top of the balance underneath the screw. Once this is done, you’ll have a new spring inside the frame, and all that’s left will be to replace the sash itself.
Step 8.
Getting the sash back in might well be a two person job. You’re going to be lifting the sash right to the top of the frame and pushing the opposite side into position. You then lower the entire sash until you can feel it moving against the spring balances. You’ll know if you’ve done it right, because the weight of the sash will immediately decrease.
Step 9.
Finally, we’ve got to re-insert the clips so they’re flush with the frame. Do this in exactly the same way as you took them out.
Step 10.
Before we finish, it’s worth checking that everything moves as it should. Be sure to lift and lower the sash entirely, several times. Once this is done, you can safely declare the window fixed.
Now, if all of this seems like a lot of work, we’d recommend you save yourself some time later down the line and replace both springs in one go.