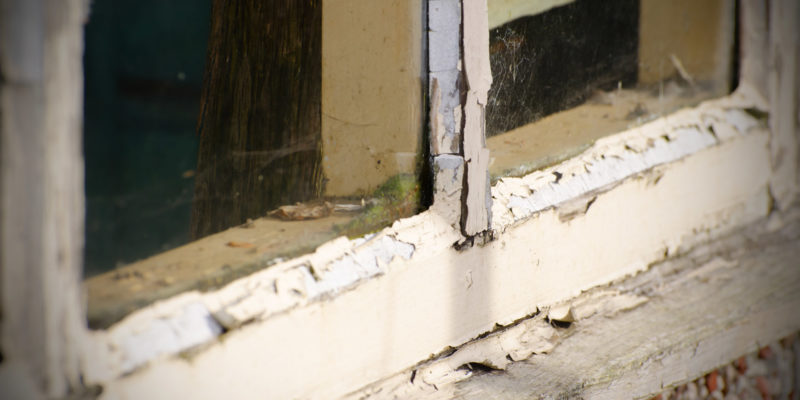
Wooden window frames are built to last. If you care for them well enough, they will stay strong and secure for years. So many years in fact, that there’s a chance you’ll fancy a change to the look of your house before you even begin to think about replacing them for practical reasons.
If you’re a bit bored with how your wooden windows look – if the paint is peeling or you’re desperate for a dash of a different colour on your window frames – you could always consider re-painting them before you replace them.
Cheaper and quicker than investing in replacement windows, a new paint job can completely refresh the look of your windows and even your whole house. It is important to do this job properly to maintain the lifespan of your frames. Making mistakes could leave your windows at risk of damp and a rot. A slapdash paint job could also leave them flaky, uneven, and looking far worse than when you started.
As with so much in life, proper preparation is the key to a fantastic finish. That means removing the old paint carefully and completely before you even think of cracking a can of gloss open.
There are a couple of ways to remove paint from wooden window frames, but we reckon the cheapest and easiest way is using a chemical paint stripper and a couple of readily available tools.
Simple Steps to Remove Paint From Wood
Using a wood stripper before you paint your wooden window frames is the easiest way to achieve a professional paint job when you’re refreshing your windows. It may take some time, but not much effort, and is definitely worth it in the long run.
Follow the steps outlined below to keep the task of removing paint from your timber windows as smooth and simple as possible:
- Prepare the Area
Paint stripper for wood can be quite a harsh chemical. Accidental spillages could cause damage, and when it works, the flaking paint will cause an almighty mess.
So, your first step is to lay down a waterproof dust sheet or tarp underneath the window. Make sure it’s secure, and the surrounding area is completely covered.
- Prepare Yourself!
Then suit yourself up. Grab some heavy duty waterproof gloves (rubber or work ones) to keep the chemical stripper away from your skin. A pair of goggles will protect your eyes, and a respirator will help keep any fumes out of your lungs.
It’s best to wear old clothes, and be prepared for the possibility of binning them after you finish.
- Consult Your Paint Remover Product
Most brands of paint stripper will have their own specific instructions. Application times and techniques can vary from product to product. Make sure your paint stripper is as effective as possible by familiarising yourself with the instructions for that particular product before you start. Follow the guidance closely.
- Apply the Paint Stripper
Use a cheap paint brush to apply a thick layer of stripper to the frame. Do it in small sections but with a heavy hand – you don’t want it dripping or running down the frame, but it will need to be a thick layer to penetrate the surface of the paint.
- Wait
Leave the wood stripper to soak in. This will take around 20 minutes, but will change depending on the paint remover for wood that you’re using. Check the manufacturer’s instructions, and set a timer. Leaving it on too long could damage the frame.
After the specified time, you should see signs that the paint remover is working. The paint may start to bubble, look uneven, or maybe start to flake away.
- Scrape the Peeling Paint Away
After the allotted time has passed, use a specific scraper tool to ease the paint off the frame. Take your time and work with care. The wood stripper should do the hard work, and you don’t want to accidentally damage the frame. If you can work the scraper under a small section of paint, you should be able to lift it off in strips.
- Repeat
If there is still a lot of paint left, or you are seriously struggling to scrape it off, you can usually apply a second layer. Check the instructions for any restrictions around timings.
- Brush Over the Frames
When most of the paint is off, use wire wool or a wire brush to ease the paint out of any curves, creases or crevices. You can be a little more rigorous with this, but again make sure not to damage the wood.
- Wipe Down the Frames
Use a damp cloth to wipe down the frame and remove any residue.
- Sand the Surface
Use a fine sandpaper (around 220 grit) to go over the window frame, to work out any scratches or scrapes and make sure the surface is smooth. It shouldn’t take long, and will give a far better finish to your next layer of paint, stain or varnish.
One of the joys of wooden window frames is how long they last, but sometimes a change feels necessary. A new lick of paint is an easy, quick, cost-effective way of refreshing the look of your windows without cutting their lifespan short. Make sure you take the time to do the job properly and you will get many more years out of them, while still getting the thrill of a brand new style.
If your wooden windows are past their best, we offer a fantastic range of timber replacement windows. From our top quality JELD-WEN range to classic timber sash and timber casement styles, we have something for any property. If you have any questions, get in touch to speak to one of our knowledgeable team.


