If you’re looking to install new windows in your home, whether to replace your old, worn-out ones, or in an effort to pro-actively cut down on your energy expenditure, then you’ll be able to save yourself the cost of installation by doing it yourself.
While there are a number of things which could potentially go wrong during the installation, these problems can be guarded against with the right planning and foresight. In this article, we’ll run through how to get rid of your old windows and install new ones.
Buy new windows
Before you do anything, you’ll need to have new windows in place to replace the old ones. You’ll want a window that’s slightly smaller than the opening, with around five centimetres of space on all sides. If your window is too big for the gap, then you’ll need to make the gap bigger – a major operation that’s far more trouble than it’s worth. If it’s too small, then you’ll need to make use of window spacers – an unnecessary complication which might interfere with the window’s heat-retaining properties. Stock replacement windows are far less costly than their custom-made counterparts, and often justify any adjustments you’ll need to make to accommodate them.
Apply for approval
You’ll also need to ensure that the windows you buy comply with building regulations, which require that a new window meet certain energy-efficiency and aesthetic standards. Before fitting the windows, you’ll need to apply for Building Control approval. If you’re fitting windows to a listed property in a conservation area, then you’ll find that the controls are more stringent. Be sure to consult your local planning authorities before commencing any work – they will send someone to inspect the window during and after the installation to ensure it meets the required standard.
If you don’t apply for approval, then you will almost certainly run into problems when you come to sell the property. Be sure that you’re using low-emission glass, and safety glass in any doors and windows near doors, or less than eight metres from the ground floor.
Remove the old windows
Before beginning, you’ll need to get rid of your old window. Do so using a crowbar. Be sure to get rid of the entire thing, including the casing, trim and sill plate.
Make adjustments
You’ll need to ensure that the new casing matches the dimensions of your new window, and should include a small gap to allow for adjustment and insulating material. You might need to install new boards to the frame; this can be done using either wood or specially-made frame extenders.
Mark fixing points
Here’s where you’ll need to begin the job of actually securing your window into place. You’ll need to mark the points on the interior plaster where you’ll fix your window to the wall. This will help to eliminate guesswork and ensure that your new window is securely held in place, and that it’s at a perfect right-angle to the wall.
Wrap your window
Before you put your window into place, you’ll need to wrap the exterior frame of the window. This will ensure that any moisture from the wall isn’t able to enter the side of the window.
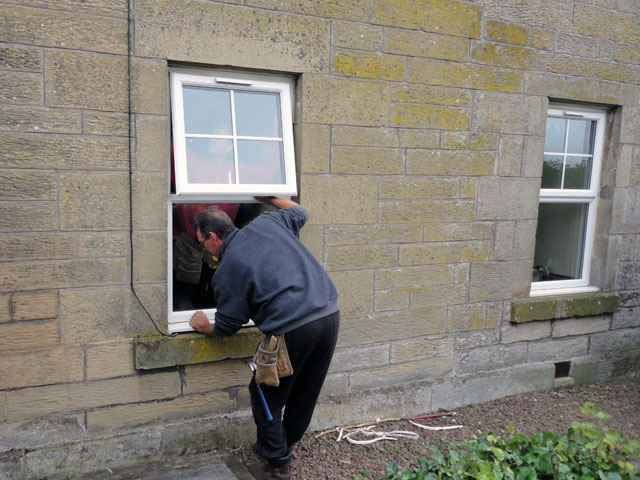
Put your window into place

Now you’re ready to finally put your window in position. Do this from the outside of the building, pushing the window upwards until it’s snug within the frame, then begin to screw your window into place. Since double-glazed windows can be extremely heavy, you’ll need the help of someone on the interior of the building to do the actual screwing. This is particularly important when it comes to first and second-floor windows.
Adjust the window
You’ll need to adjust the window in order to properly align it. Do this with the help of a spirit level, using spacers to make small adjustments until the window is entirely square to the wall.
Wrap the window (again)
Now that your window is in place, it’s time to add a second layer of wrap, this time around the fins of the window – the vinyl strips around the exterior of the window. Be sure that you’ve created a tight, creaseless protective layer – this will help to guard against unwanted moisture entry.
Insulate the window
In order for your window to effectively exclude draughts you’ll need those gaps at the side to be tightly sealed. This is done using two different sorts of special expanding foam sealant. Fill any obvious gaps with filler. This stuff will expand quickly to fill any gaps – but be sparing with it, as too much will deform the position of the window. Cut away any excess using a Stanley knife once it’s dried.
You don’t need to worry about creating a perfect fit at this point, as the next phase will involve applying a second layer of frame sealant. This goes all the way around the edge of the frame, creating a nice, smooth and even finish all the way around.
Apply trim where required
You might want to disguise the sealant and fixings using a trim, which runs around both the exterior and interior of the window. Trims come in a range of styles to match different windows and tastes, and can be glued into place with frame sealant.
Is it worth the hassle?
Fitting your own windows is a task which, on the spectrum of DIY procedures, ranks somewhere in the middle – while it’s not quite as straightforward as unblocking a sink or changing a light bulb, it’s something which can be done in around half a day – saving money in the process.
Whilst it might be tempting not to involve building control – particularly if you’re not looking to sell the property in the near future – doing so will likely cause stress at some point down the line. Ensure your house is as well-insulated as it can be, by going about things the right way – and you’ll save yourself hassle and money in the long term!
Looking for new windows for your home? Browse our sliding sash or casement windows or find out about our handmade bespoke windows.